3.编程思路与步骤 #
3.1 编程思路 #
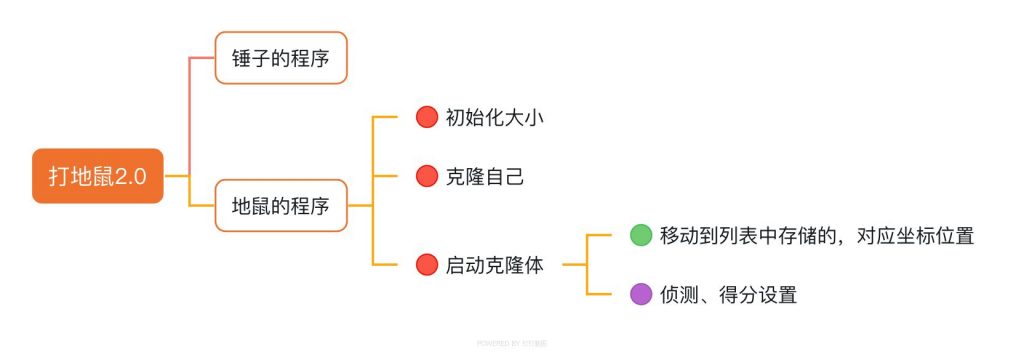
3.2 地鼠编程步骤 #
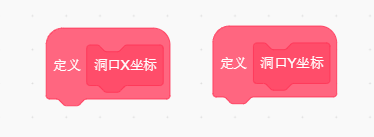
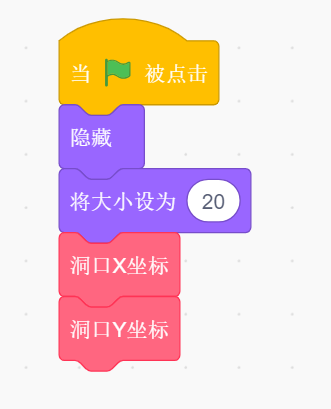
(1)自定义程序
我们要调用每个洞口的坐标位置,首先要自定义X坐标、Y坐标的函数。
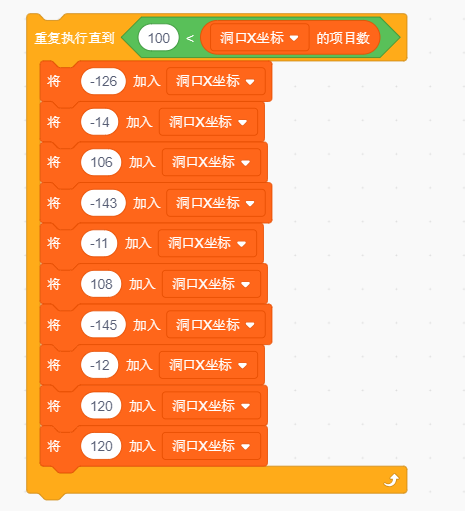
(2)创建列表,存储坐标
创建两个列表,分别存储洞口的X坐标和洞口的Y坐标。
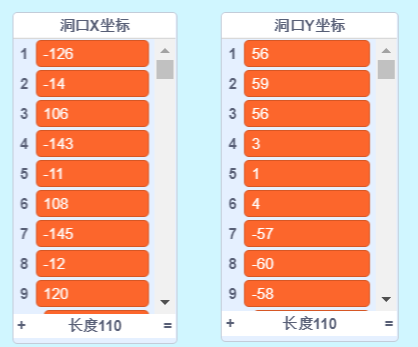
现在我们已经定义好了洞口的坐标程序,只需要调用其中的函数就可以使用了。
坐标参数也可以直接在列表中直接输入。
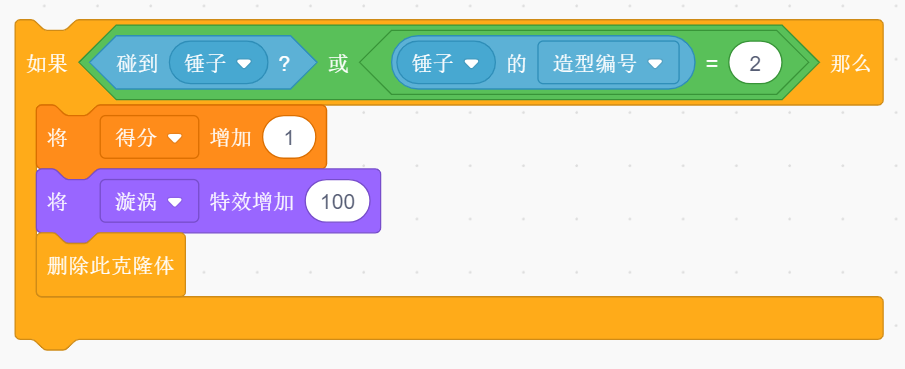
(3)克隆体程序
启动克隆体后,我们需要调用对应的X坐标与Y坐标,
也就是设置克隆体出现的位置时,必须同时调用列表中第n行X坐标及第n行Y坐标。
这样才能保证,出现在对应的洞口中。
这里的N是随机数,我们创建一个序号变量,让序号初始值为1,随机进行增加。


(4)侦测锤子
如果碰到的锤子为砸下去的造型,呢吗将得分增加1,将克隆体删除。
4.问答和课后练习 #
练习使用自定义函数与列表,完成一个创意小作品。
尝试一下吧!


